What an event is in fiveanddime
An event is a single fair, market, show, festival, or pop-up. One booth-day (or weekend, or week) at one venue. Every sale you ring at the booth is tagged with the event it happened at, which is how the reports can show "$459 at Brighton on Saturday" or "your top sellers at Christkindlmarkt."
The template ships with one sample event, Test Event, so you could ring practice sales in the setup tutorial. Now we add real events as you book them.
Two ways to add an event
Directly in the Events sheet
Open your fiveanddime spreadsheet, click the Events tab at the bottom, scroll to the next blank row, fill it in. Fastest way to add several events at once (planning your season).
From the app, via Settings → Edit event
Open fiveanddime, go to Settings, expand Edit event. Type the event name (or pick from the dropdown if it exists), fill the form, save. The event lands in your spreadsheet immediately.
This is the path you'll usually take. It's faster on a phone and the form labels remind you of what each field does.
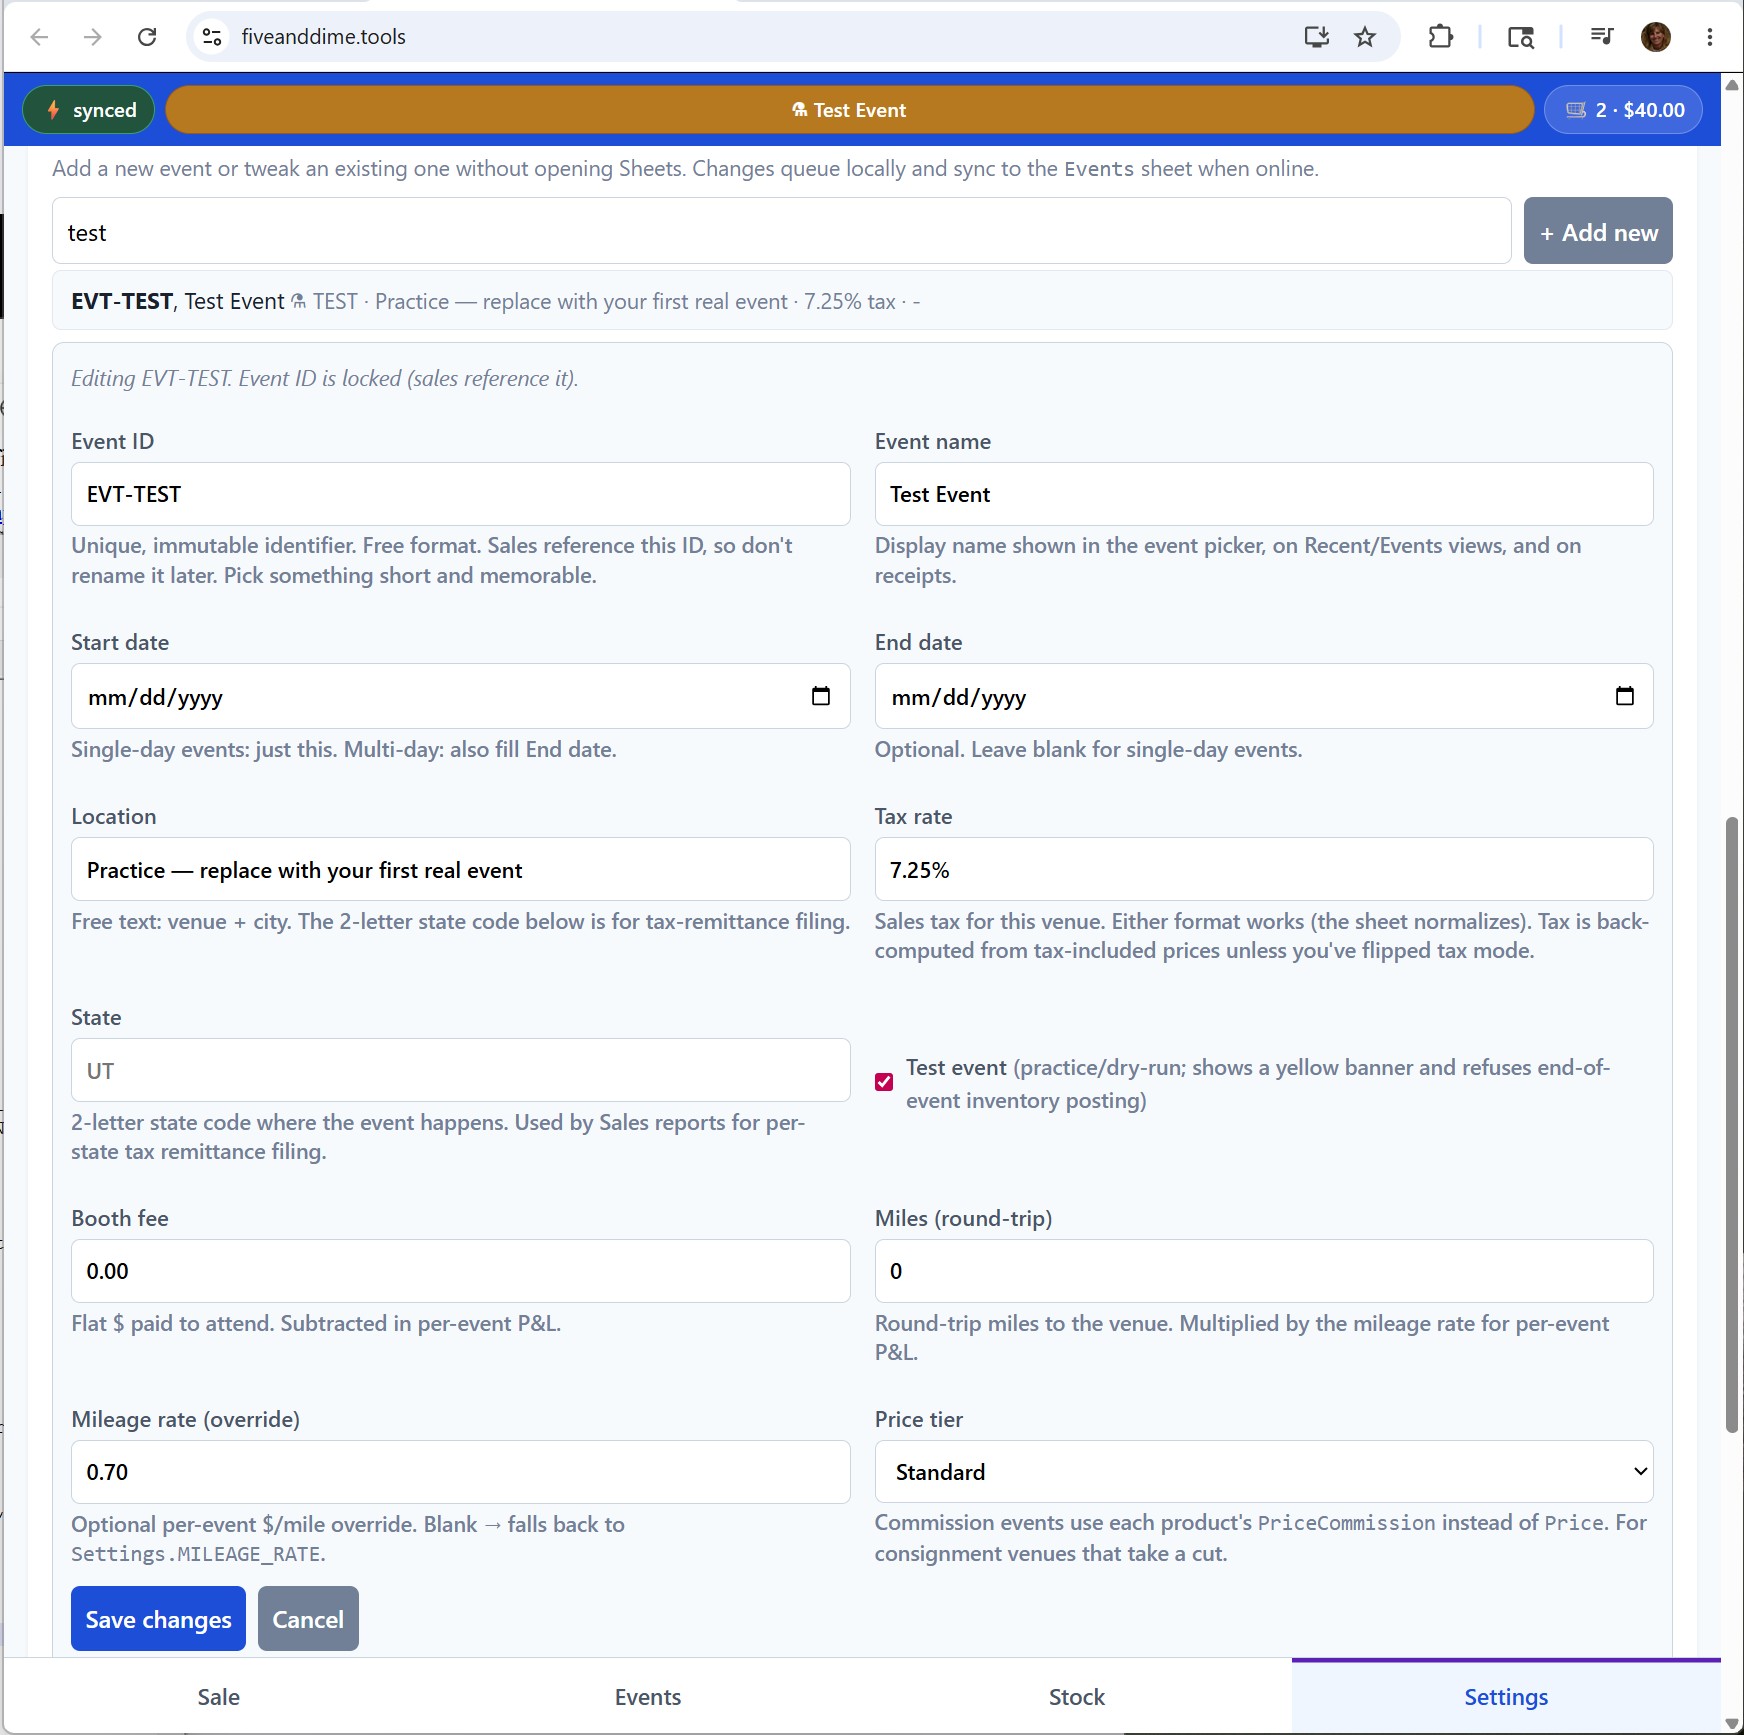
The must-fill columns
Four columns every event needs:
- EventID. Unique identifier. Don't rename once sales reference it. Pick something memorable and short. Examples:
BRIGHTON-JUN-2026,XMAS-MARKET-2026,SLC-FARMERS-AUG. - EventName. The display name shown in the app's event chip and on receipts. "Brighton Summer Festival" or "Christmas Market at Liberty Park." Can be changed later without breaking history.
- StartDate. First day of the event, in
YYYY-MM-DDformat (so2026-06-14). Sorts chronologically as text. - TaxRate. The sales tax for the venue. Accepts any of
7.25%,7.25, or0.0725; fiveanddime normalizes either way. Check your state department of revenue if you're unsure; the rate varies by city/county.
Should-fill for accurate P&L
These aren't required but you'll want them once you care about profit numbers:
- Location. Free text. The venue name or address. Doesn't affect math; shows up in reports and the event picker.
- BoothFee. What the venue charged you for the booth (dollars, just the number). Gets subtracted from the per-event P&L. Leave at 0 if free.
- Miles. Round-trip miles from your shop to the venue. Combined with MileageRate to compute the deductible cost of driving there. Covered in detail in the Calculating profit per event tutorial.
Optional / advanced columns
- EndDate. Blank for single-day events (StartDate is enough). For multi-day events, the last day, in
YYYY-MM-DDformat. Used by the event picker to show date ranges and by reports to know when the event closes. - MileageRate. Per-event override. Blank uses the default in Settings (
MILEAGE_RATE). Override per-event only when this event used a different rate (rare; usually one rate works for the whole year). - State. Two-letter state code (UT, CA, NY). Used by Sales reports for per-state tax remittance. Blank falls back to
HOME_STATEin Settings. If both are blank, the event has no state and is skipped by per-state filters. Covered more in the Sales reports tutorial. - PriceTier. Either
standard(default) orcommission. See the next section. - IsTestEvent. Checkbox. TRUE for events used to practice (template's Test Event is one). Test events refuse end-of-event inventory posting so practice sales don't move stock. Default FALSE.
Commission events
Some venues, especially consignment-style spaces, take a percentage of every sale. The standard pattern: mark the event's PriceTier as commission, and the POS will use each product's PriceCommission column (a higher price you set in Products_Master) instead of the regular Price. The customer pays the higher number; the venue's cut comes out of the difference.
For this to work, you fill in PriceCommission on the products you'd sell at consignment venues. Blank PriceCommission falls back to the regular Price (no markup). Commission tier is opt-in per event.
Activating an event in the app
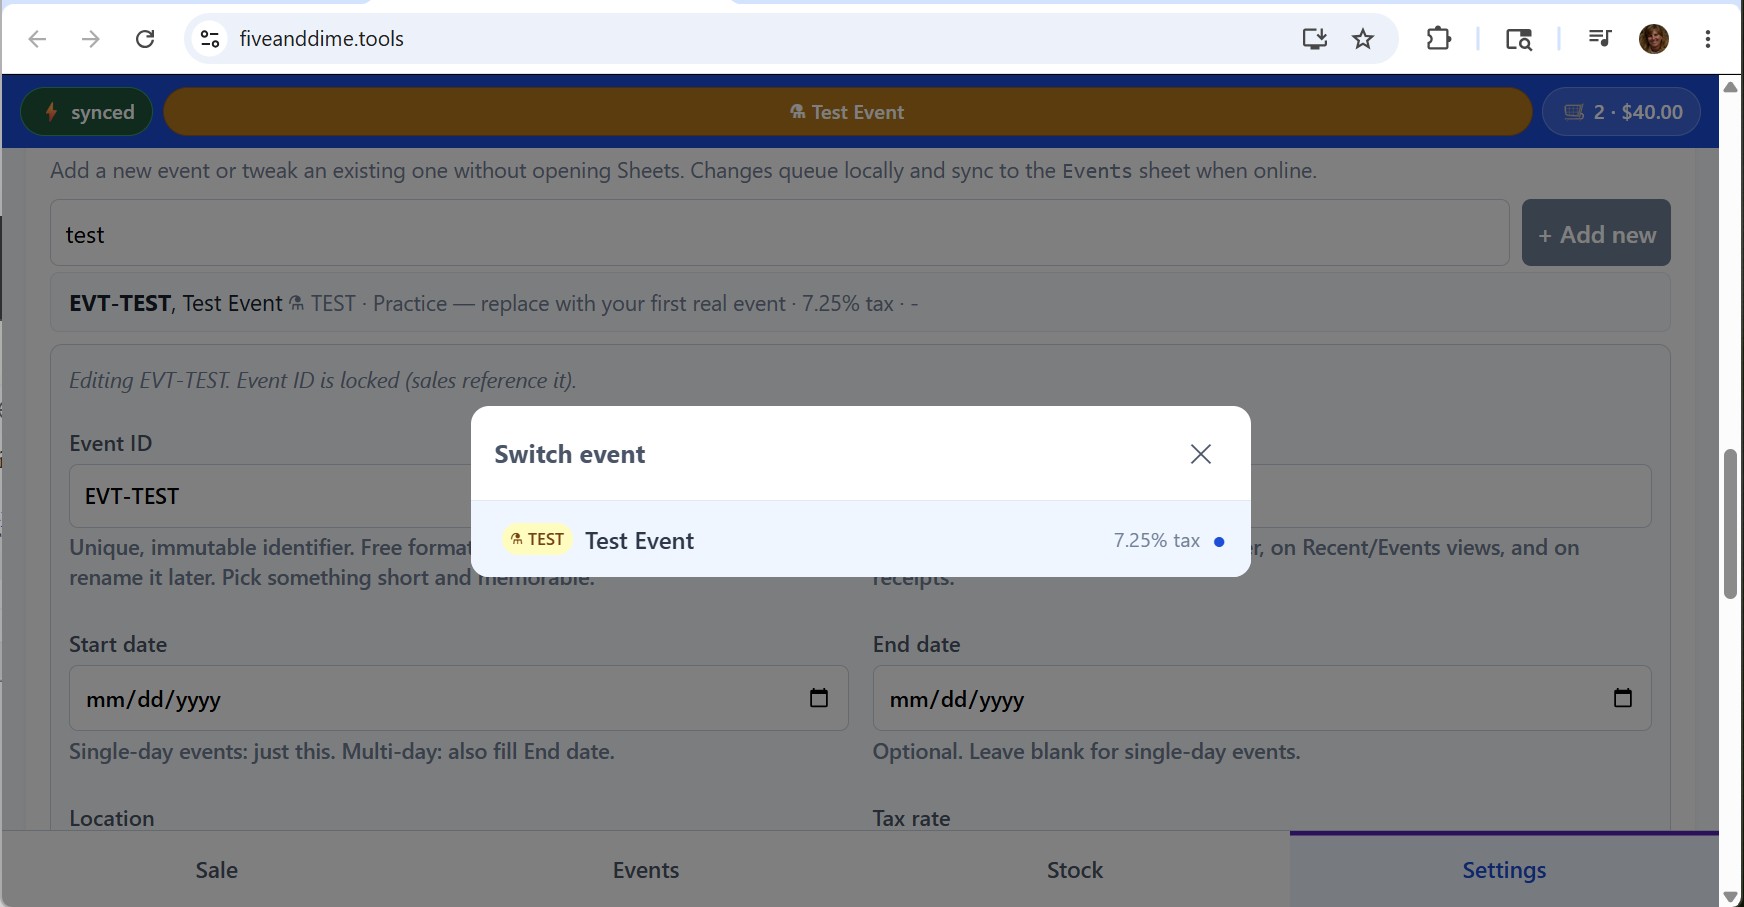
The Sale view always runs against one active event. The event chip at the top of the screen shows which one is currently selected. It sits in the middle of the top strip and reads with the event name and date.
To switch: tap the event chip, pick from the list. The list shows current and upcoming events at the top; past events lower down. Tap the one you want and the cart immediately starts ringing sales against that event.
Test events: a practice mode
The template comes with one, but you can mark any event as a test by setting IsTestEvent to TRUE. While a test event is active:
- A small banner shows above the Sale view warning you it's a test (so you don't accidentally count practice sales as real).
- End-of-event inventory posting is blocked. Your QuantityOnHand numbers stay where they are no matter how many practice sales you ring.
- The event chip is tinted orange.
Useful for trying out features, training a helper, or letting a kid play "store" without polluting your real data.
Sales rows reference EventID directly. If you rename a column value (say, BRIGHTON-JUN-2026 to BRIGHTON-2026), every sale that pointed at the old ID stops linking to the event in reports. EventName is safe to rename anytime; EventID is what every sale uses to find its event, so if you rename it the links break. If you really need to change an EventID, do a find-and-replace across both the Events and Sales sheets.
The night before. Whatever you know about the event by then is usually enough (name, date, tax rate, booth fee). Update Miles and any other details after the event if you forget. The app doesn't care; the math works as soon as the fields are populated.