Products and the columns that matter
Every product is one row in Products_Master. There are a lot of columns, but most are optional. We'll cover the must-fill columns first, then walk through every other one in plain English.
Must-fill columns
You can't ship a product without these four:
- SKU. Unique product ID. The rest of the system uses it to find this product (sales, inventory, bundles). Pick a convention and keep them stable. Don't rename a SKU once you've used it; if you do, past sales stop linking to the product and your history breaks. Shorter SKUs print better on small labels too: the Avery 5167 format (the 80-up small labels) has limited room for printed text, so SKUs under about 6 characters fit comfortably. Example:
BOO00,BOO01,BOO02. - Name. The display name shown on POS buttons and in the cart. Be specific enough to distinguish similar items. "Seasonal Door Sign" plus a Variant of "Spring" reads cleanly; "Sign" alone doesn't.
- Category. The Code from your Categories sheet. Has to match a row in Categories or the product won't show up under a tab. Example:
DSN. - Price. The sticker price the customer pays. Tax-included by default. (You can switch to tax-on-top in Settings; that's covered in the Settings tutorial.)
Optional but you'll want them
- Cost. Your cost of goods per unit. Optional, but blank means no profit numbers in reports. Covered in detail in the Calculating profit per event tutorial.
- BringToShow. Checkbox. When unchecked, the product stays in your inventory but is hidden from the POS booth UI. Use this for items you're not bringing to a particular event. Default is checked.
- Active. Checkbox. Soft-delete flag. Uncheck to hide a discontinued product without losing its sales history. Defaults to checked.
- FavRank. Number. Position in the Favorites tab on the Sale view. Lower number puts a product earlier. Use 10, 20, 30 spacing (same convention as SortOrder on Categories) so you can insert a new favorite at 15 or 25 without renumbering everything. Blank or 0 means not in Favorites. Useful for your top-sellers; faster to tap than scrolling categories.
- ImageUrl. URL to a thumbnail. Renders on the POS item button alongside the text. Visual recognition is faster than reading at booth speed. Easiest workflow: drop SKU-named files into a Drive folder, paste the folder URL into Settings → Product photos in the app, tap Update. See the Product photos tutorial for the full walkthrough.
The rest, briefly
- PriceCommission. Money. Used at events with commission tier (consignment-style fairs that take a cut). Blank falls back to Price. Covered in the Setting up an event tutorial.
- QuantityOnHand. Number. Current inventory. Auto-decrements when you post sales after an event. Covered in the Tracking inventory tutorial.
- ReorderPoint. Number. When QuantityOnHand drops to or below this, the booth UI shows a "LOW" badge on the product button so you know you're running out. Blank disables the badge for that SKU.
- Custom. Checkbox. When checked, the cart shows a "+ Customize" button on lines for this product (custom engraving, custom color, custom design). The customization details are saved with the sale.
- ParentSKU and Variant. Used for products that come in flavors (sizes, colors, months). Covered in Step 3.
Look at the column headers in Products_Master. The columns the app reads and writes have a pale cream tint and a hover note ("SYSTEM COLUMN, read by the fiveanddime app. Don't rename, move, or delete this column, it breaks the UI."). Anything that's not tinted is yours. Add notes columns, supplier names, photo filenames, formulas, whatever you want; the system only touches columns it knows about and your additions survive across edits and updates.
Adding products: two ways
Directly in the spreadsheet
Open Products_Master, scroll to the bottom, type a new row. Fill in at least SKU, Name, Category, Price. Save (Sheets autosaves).
This is the fastest path for bulk entry. If you're starting from a list of products somewhere else, paste them in column-by-column.
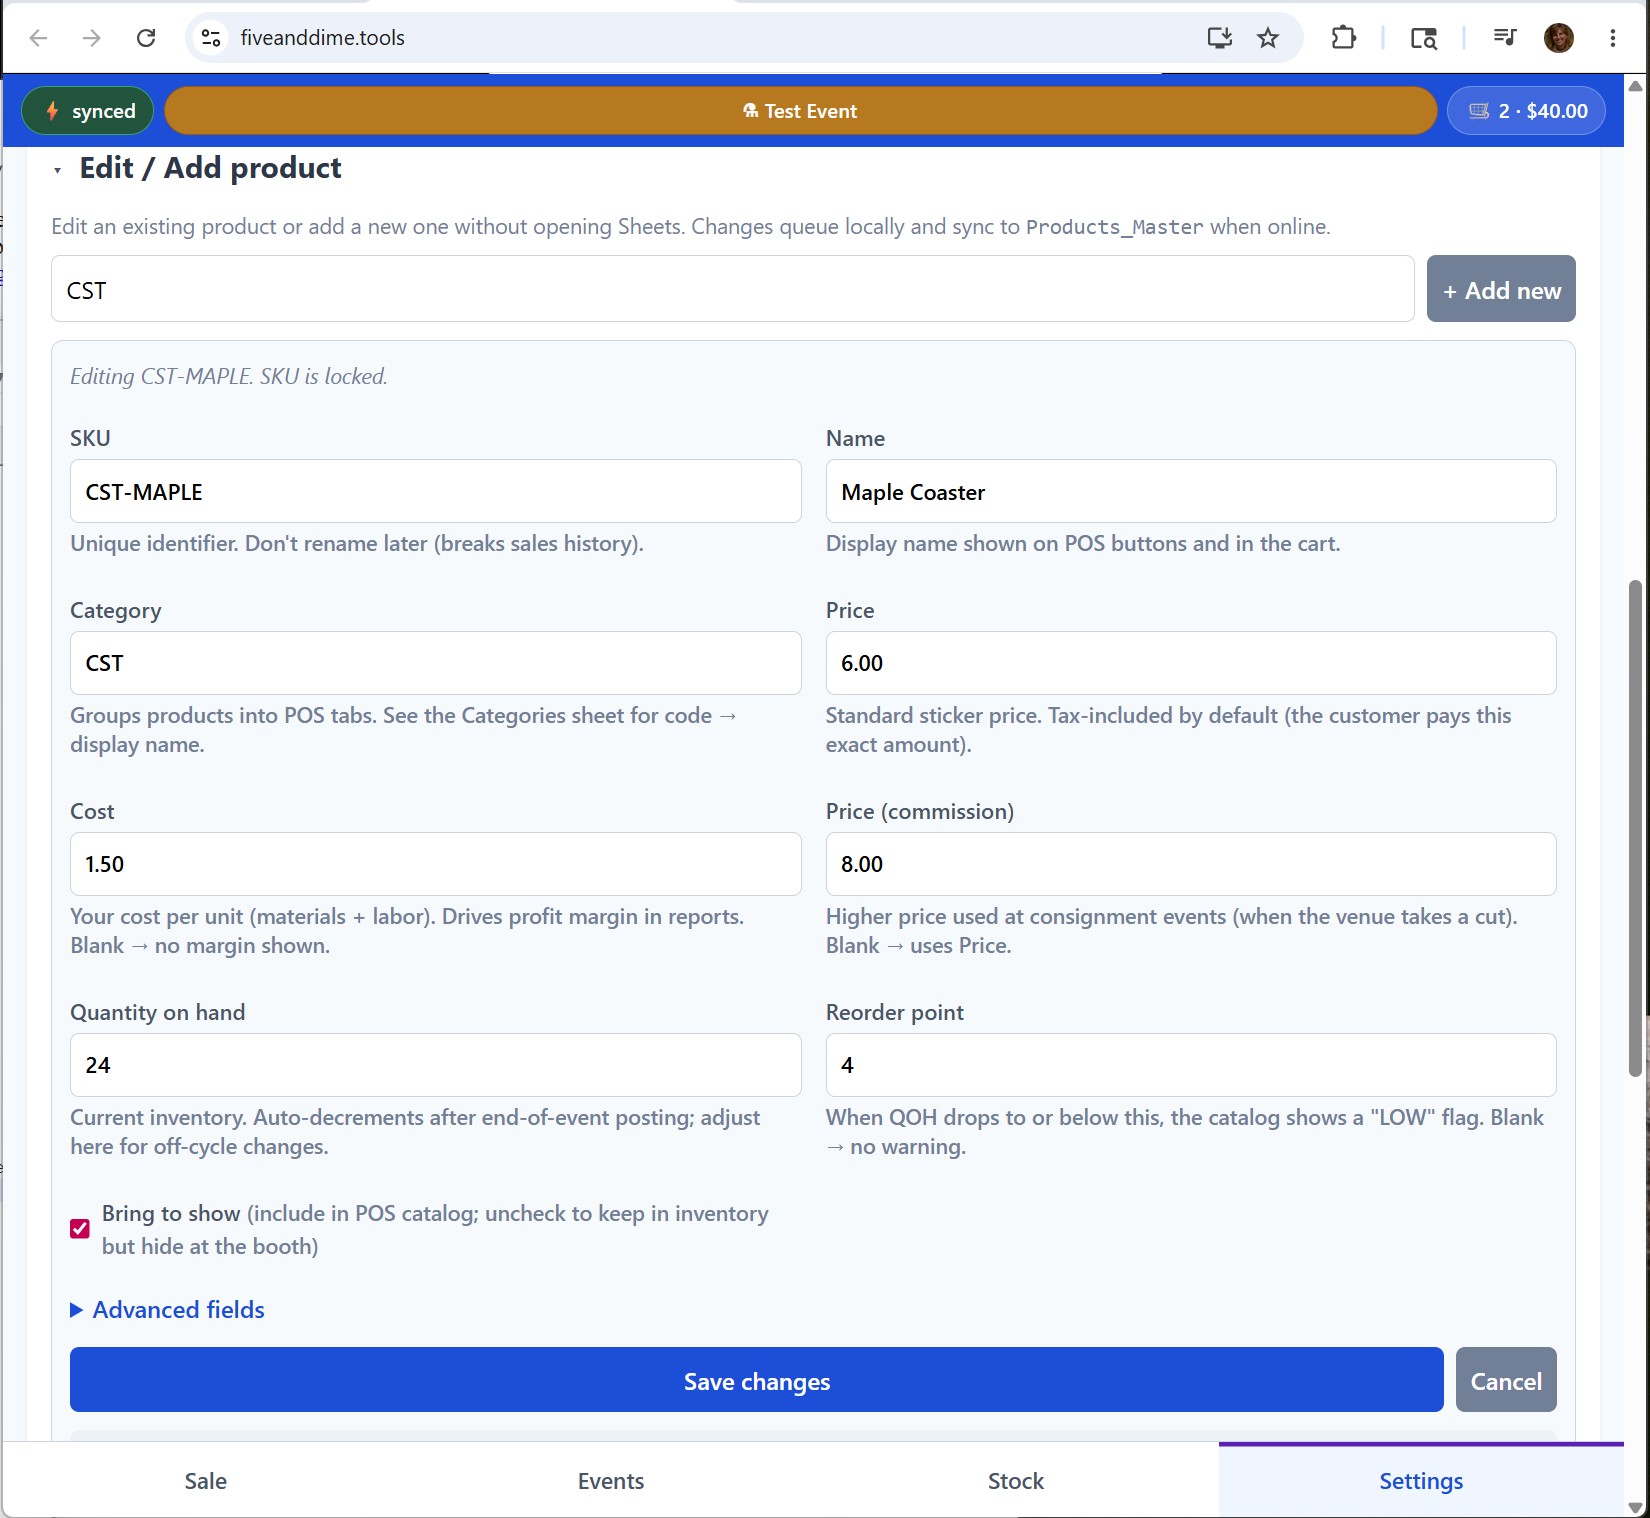
From the app, via Settings → Edit product
If you're at the booth and need to add a one-off product on the fly, the app has an in-app product editor. Open Settings, expand Edit product, type SKU and Name, fill the form, save. The product lands in your spreadsheet immediately.
Every other sheet (Sales, Inventory_Transactions, LineItems, Bundles eligibility) uses SKU to find this product. If you rename a SKU after sales exist, those past sales no longer link to the product. If you really need to change a SKU, uncheck the old product's Active checkbox (preserves history) and create a fresh product with the new SKU.
Removing products: soft vs hard delete
- Soft delete (recommended): uncheck the Active checkbox. The product disappears from the POS but its sales history stays linked. Use this for discontinued products.
- Hard delete: delete the row entirely. Use this only for products that never sold and have no history (mistakes, duplicates). Anything that's been sold should soft-delete to keep your reports honest.
As before: when you're done editing the sheet, open the app and go to Settings → Pull from Backend Now so the new products show up. Sheet edits don't sync automatically.